
EndNote offers more than 7,000 bibliographic styles, but only the most commonly used come preloaded with your EndNote software. Click here to locate and download additional styles on the official EndNote support site.
Download Style Harvard_UON for the Australian Style Guide Manual (ASGM) "Style Manual: The standard for Australian Government writing & editing", 7th ed (2021)
- To install a new or updated output style, first locate and download the style from EndNote's output styles (Fig 1)
- Open the downloaded style
- The file will open in EndNote.
- Click File > Save as (Fig. 2)
- Save the output style. Save the output style. This will be in the “Style” folder of your PC or Laptop. You can check the location of your Style folder by selecting Edit > Preferences > Folder Locations.
- By default, "Copy" is added to the end of the name. Rename it if you wish.
The style should be automatically added to your drop-down lists. You can also find the new style via the EndNote toolbar in Word, and via EndNote > Tools > Output styles > Open Style Manager.
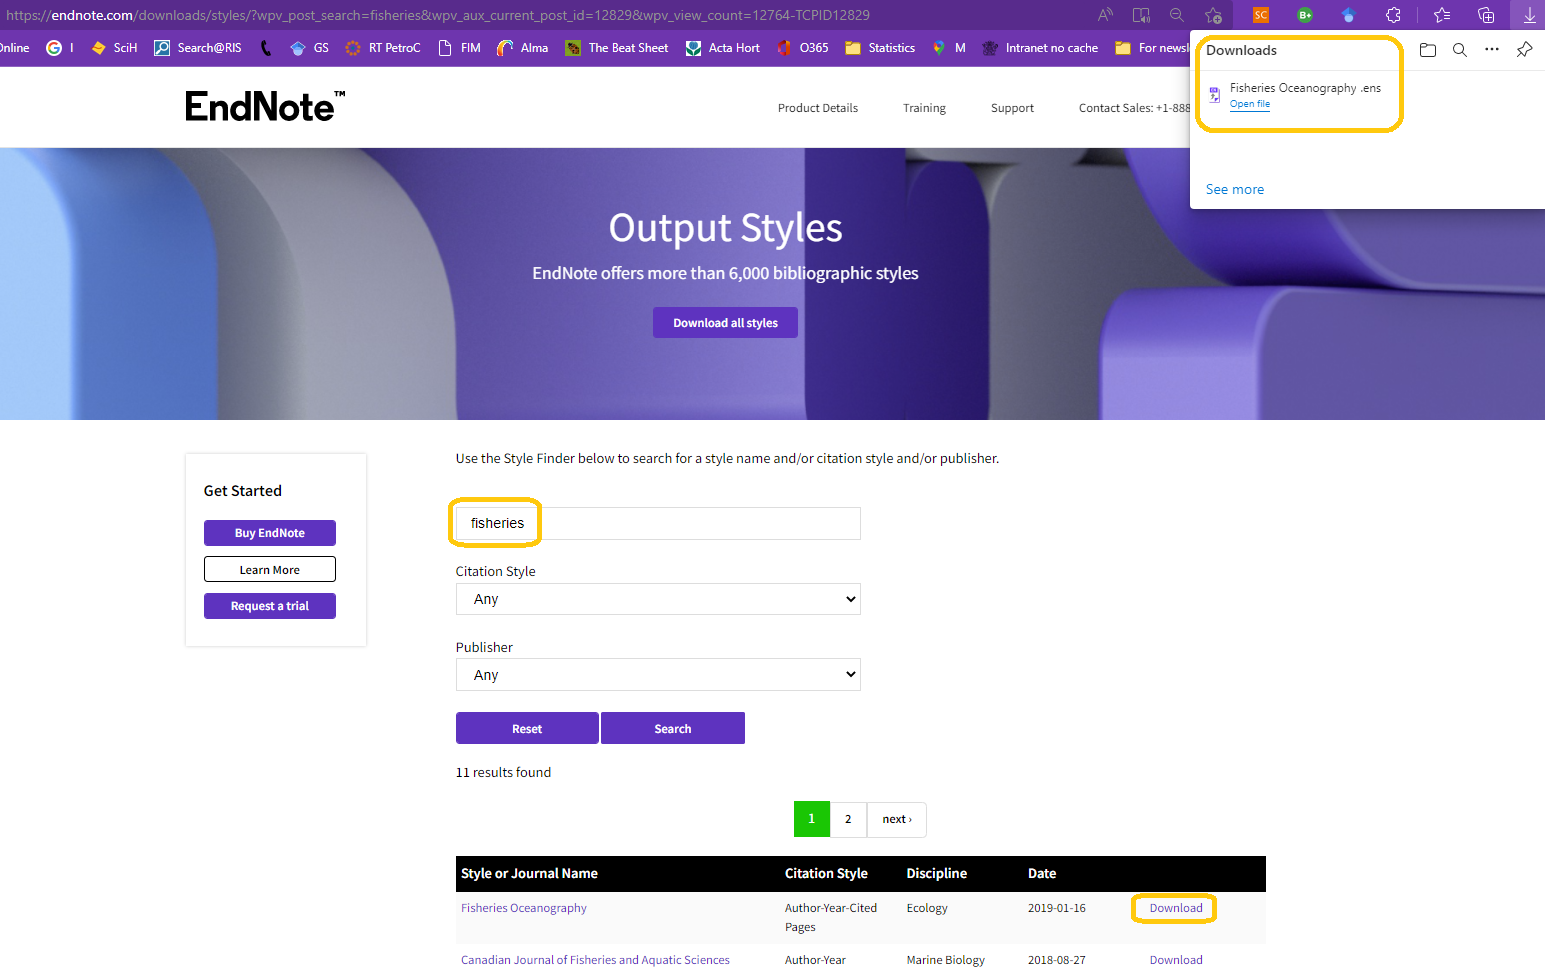
Fig. 1
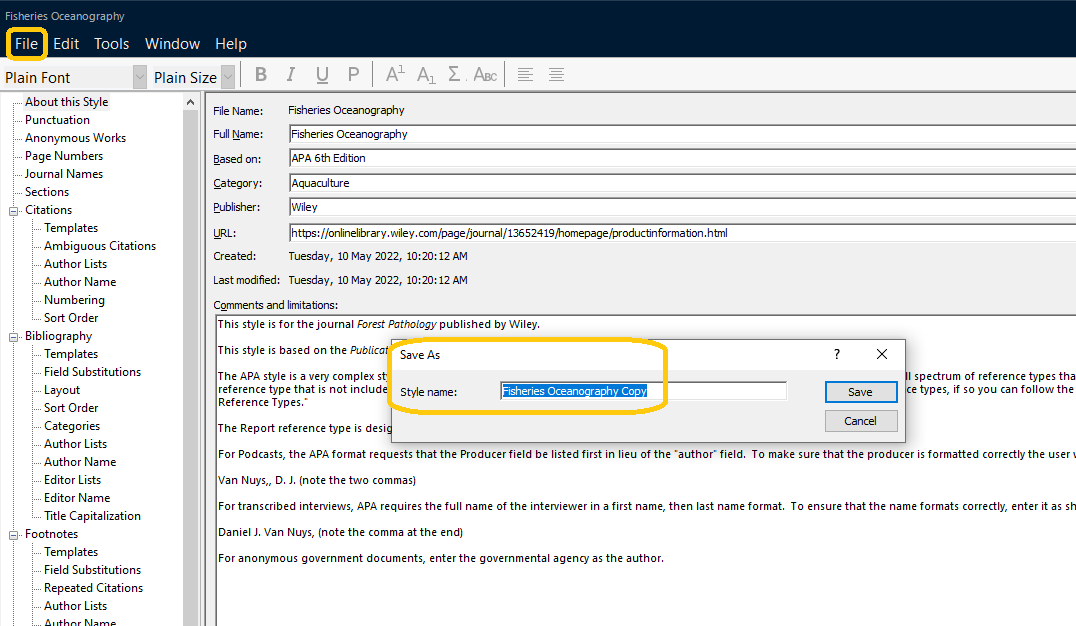
Fig. 2.
A powerful EndNote feature is the ability to set a style and have your in-text citations and bibliography automatically change to fit the chosen style. However occasionally EndNote may not provide the output style you need, and for that reason you can create your own style or modify an existing one to your needs.
This EndNote manual provides a detailed overview of Reference Types (essential to understanding Output Styles) and modifying output styles.
Refer to "Modifying reference types and output styles for windows" on the vendor site.
Contact RIS if you need further assistance.
To preview an output style in EndNote:
- Select the reference you wish to preview
- In the Preview subpanel (bottom right hand side), select the citation style you wish to preview
- The selected style will appear in the preview subpanel.
- If the preview doesn't appear, select the arrow icon to enlarge the Preview subpanel (Fig. 1).
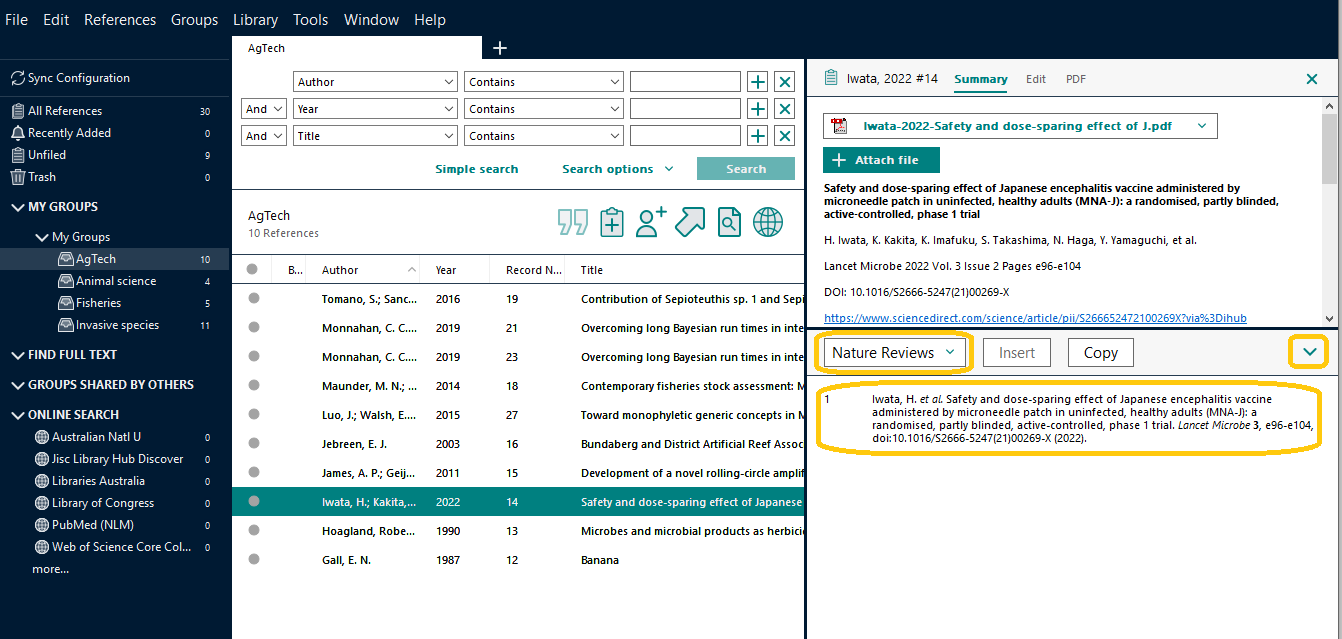
(Fig. 1)